Contents:
- Introduction & Goal
- Why Use Lambda anyways?
- Two Real Life Lambda Use Cases
- Local Development Environment (AWS SAM CLI)
- Python Function – Watermarking a PDF
- Local Testing
- Uploading Code to Lambda
- AWS API Gateway – Setting the Endpoint
What’s not covered:
- Authentication/IAM/Roles
- S3/Other services integration
Introduction & Goal
Serverless architecture has some good uses if you plan in advance.
Anytime you use a service like AWS Lambda you should ask yourself “Why bother, is the additional complexity really justified?”.
Additionally, you should think about the costs as they can be unpredictable, they’re not constant like EC2 or RDS.
I suggest you find out roughly how many requests you’ll be making monthly, average duration of each request (Start to finish), how much memory each request needs etc.. Then head over to AWS price calculator and get a prediction.
Last but not least we’ll be using AWS SAM CLI for local development but it’s not a requirement!
If you can’t get AWS SAM CLI running locally you can simply write your Python code in lambda_function.py, start Python HTTP server, open an endpoint and use Postman to POST to the endpoint to test it, then put all your python dependencies in a folder, zip it all and upload to S3.
Goal
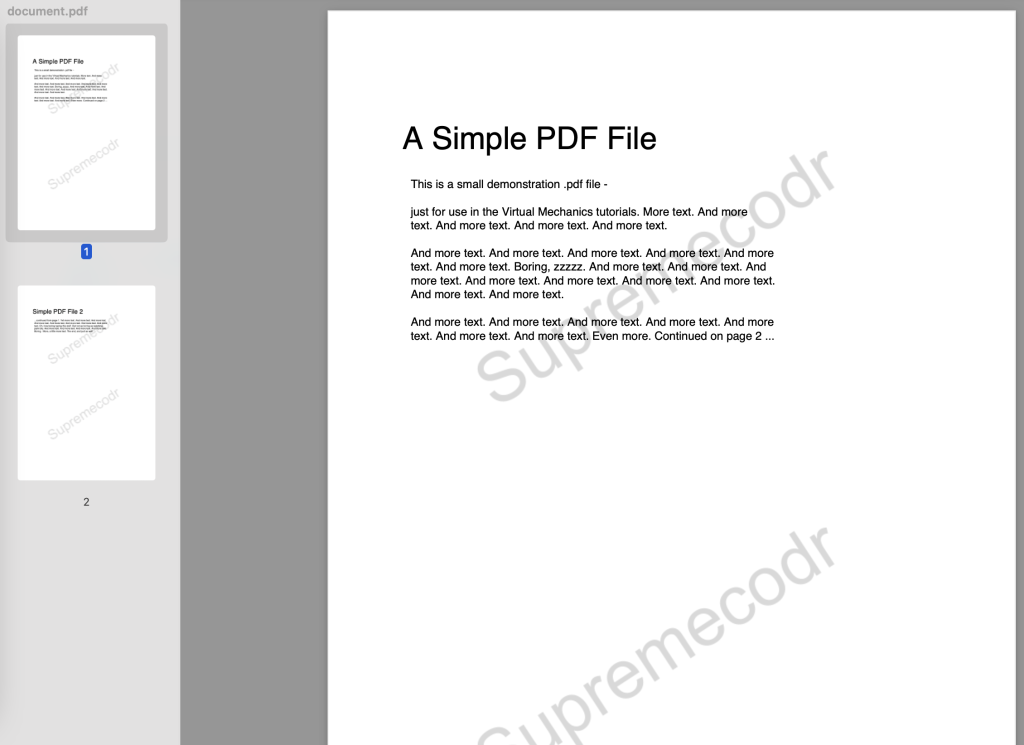
Our AWS Lambda function will receive a PDF we’ll put a watermark on, and a second PDF containing the watermark image (“Supremecodr”). AWS will receive these via HTTP POST request.
It will then merge the PDFs together and return a newly watermarked PDF.
Final PDF:
Why Use AWS Lambda anyways?
Generally speaking if you’re not sure about the amount of resource your code will use you can give Lambda a go. It will create a temporary server for you on fly and destroy it as soon as the request terminates.
If you need it to handle 1000 requests simultaneously it can do so automatically by increasing the server capacity for you. On an EC2 server you’d have to manually increase server capacity.
Two real life Lambda use cases
- Process audio files: You can watermark an audio file, cut it, join audios together etc.. if you did this on your EC2 or other server there’s a chance your server would run out of memory or see timeout errors.
- Extract data from XML files: You can extract data from large XML files. On a regular server you’d need to split the file, Queue it and then extract data off it. With Lambda can upload the file to S3 and process it without having to worry about server bottleneck. (Note this doesn’t mean processing won’t take time).
Local Development Environment (AWS SAM CLI)
Make sure you have Python installed.
Then go grab and install AWS SAM CLI tool. Like I said this isn’t required but it’ll make our lives easier as it’ll create a basic template/code to work on and setup local API to throw test data at.
You’ll also need to have Docker installed & running as it’s used to create a virtual environment that matches AWS’s environment. This is not a requirement to create Lambda function as I’ve already mentioned.
We’ll follow the basic flow Create Lambda Function Locally -> Test it -> Upload Code to AWS Lambda.
Run sam init to start creating basic project. See the choices I’ve entered in the screenshot below. Make sure Docker is running..
Beware the options may change in future. Make sure if you’re asked to select Python version you select same version as your local. I’m running Python 3.10.11.
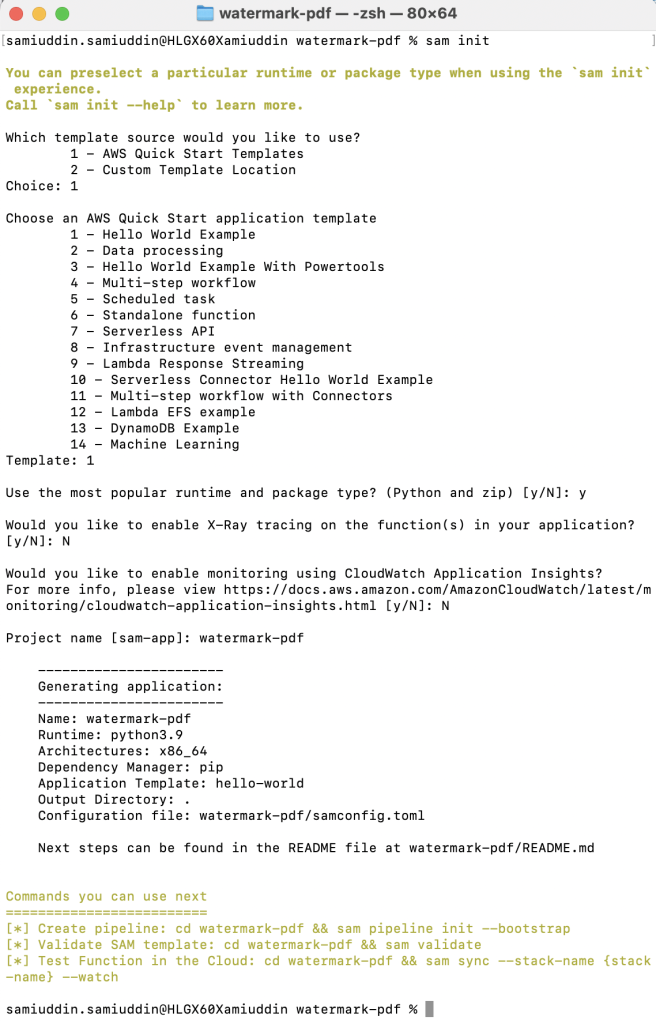
That’s it! we got the basic project setup.
Important note! You should have experience with whichever runtime you’re using. In this case we’re using Python, NodeJS is another popular option.
Python function – watermarking the PDF
Go to project directory, open hello_world/app.py and add below code:
import json
import base64
from io import BytesIO
from pypdf import PdfReader
from pypdf import PdfWriter

def lambda_handler(event, context):
    # Read and decode Base64

    body = json.loads(event['body'])
    orig_pdf_base64 = base64.b64decode(body['file'])
    watermark_pdf_base64 = base64.b64decode(body['watermark'])

    orig_pdf = PdfReader(BytesIO(orig_pdf_base64)).pages
    new_prd_writer = PdfWriter()

    # Loop through pages
    for page in orig_pdf:
        watermark_pdf = PdfReader(BytesIO(watermark_pdf_base64))
        watermark_img = watermark_pdf.pages[0]
        watermark_img.merge_page(page)
        new_prd_writer.add_page(watermark_img)

    pdf_bytes = BytesIO()
    new_prd_writer.write(pdf_bytes)
    pdf_bytes.seek(0)

    # Convert back to base64 and return obj
    encoded = base64.b64encode(pdf_bytes.getvalue()).decode('utf-8')

    return {
        "statusCode": 200,
        "body": json.dumps({
            "message": encoded,
        }),
    }
Next, add dependencies to requirements.txt file withing same folder, add pypdf and remove requests.
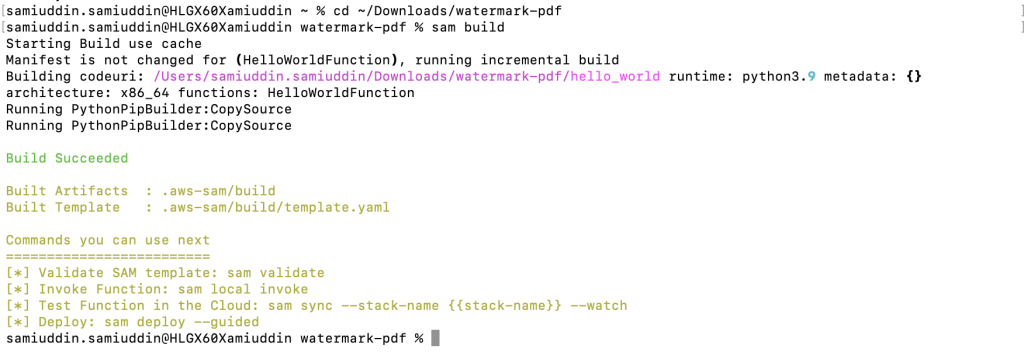
Next run sam build from project root (watermark-pdf). This command will build the code & install the dependencies for you.
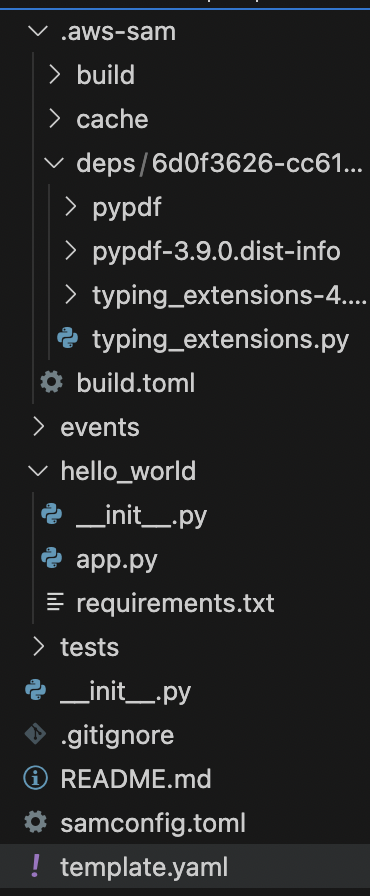
You should run it whenever you make a change. You can also see the dependencies in watermark-pdf/deps.
sam build
Dependencies
Be aware that some of your PDFs may be very large in size! (This may be a good case to use S3 bucket for storage of PDFs but that’s out of the scope of this article). Something to keep in mind.
So far we’ve created a basic project using SAM CLI, installed dependencies and built our code.
Now we’re ready to test it.
Local Testing
Lets start a local API server using SAM CLI and send some data to it to see what Lambda returns..
Before we start the API we have to configure the HTTP method in the template.yaml file in root of the project. Change the method from get to POST.
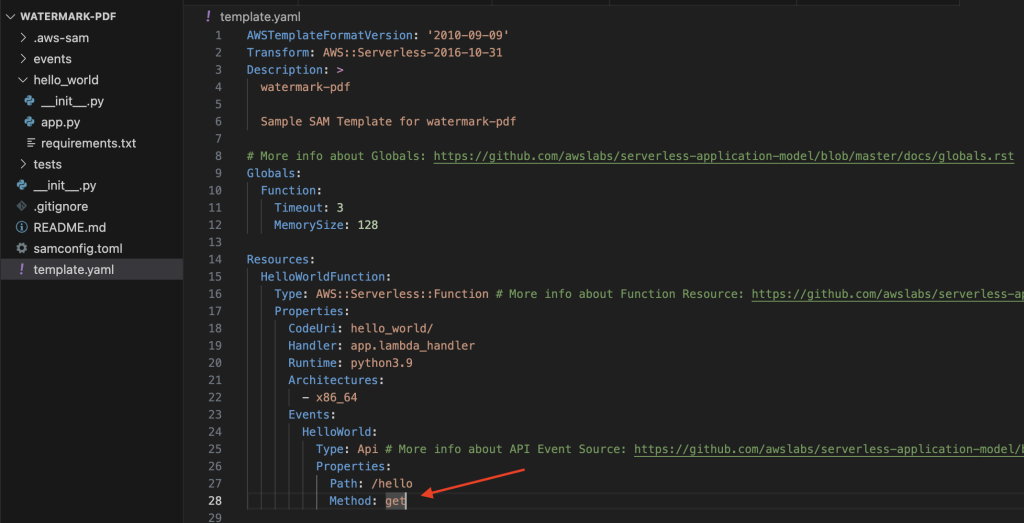
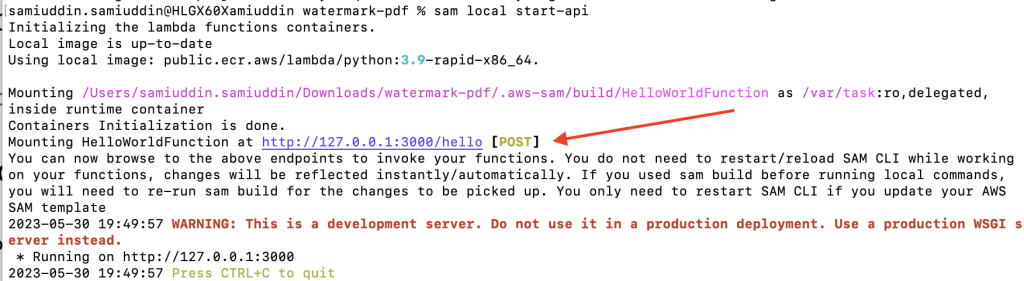
Run sam build again as we’ve changed the code followed sam local start-api
(Make sure Docker is running..)
The API should have now started.. (note the endpoint, mine is http://127.0.0.1:3000/hello)
Worth keeping in mind that this is just one of many ways to test your code. After all it’s just a Python function!
Sending PDFs to the API
The local API is now running this means we’re ready to send JSON data to it via Postman (or any other tool you prefer). Before we send the PDF we must encode both in Base64. You can use online services to convert the PDFs into Base64 for sake of this tutorial.
Be sure to replace the values. Encode both files one by one.
Example JSON format:
{
  "file": "base64encoded pdf",
  "watermark": "base64encoded watermark image pdf"
}
Once they’re both encoded add them both to JSON in Postman and enter the correct endpoint and change the method to POST.
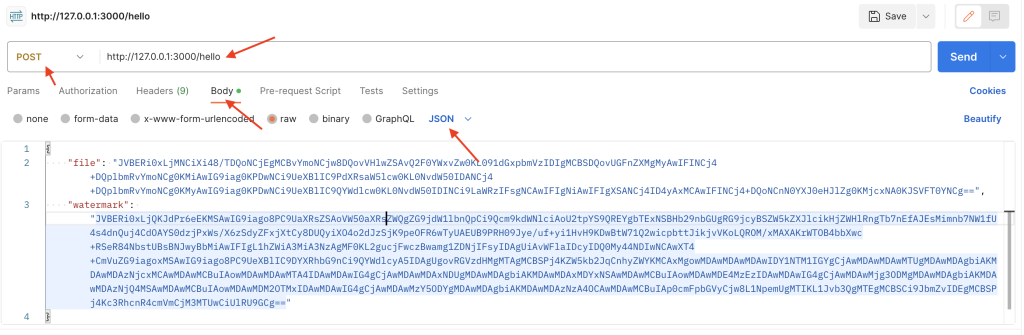
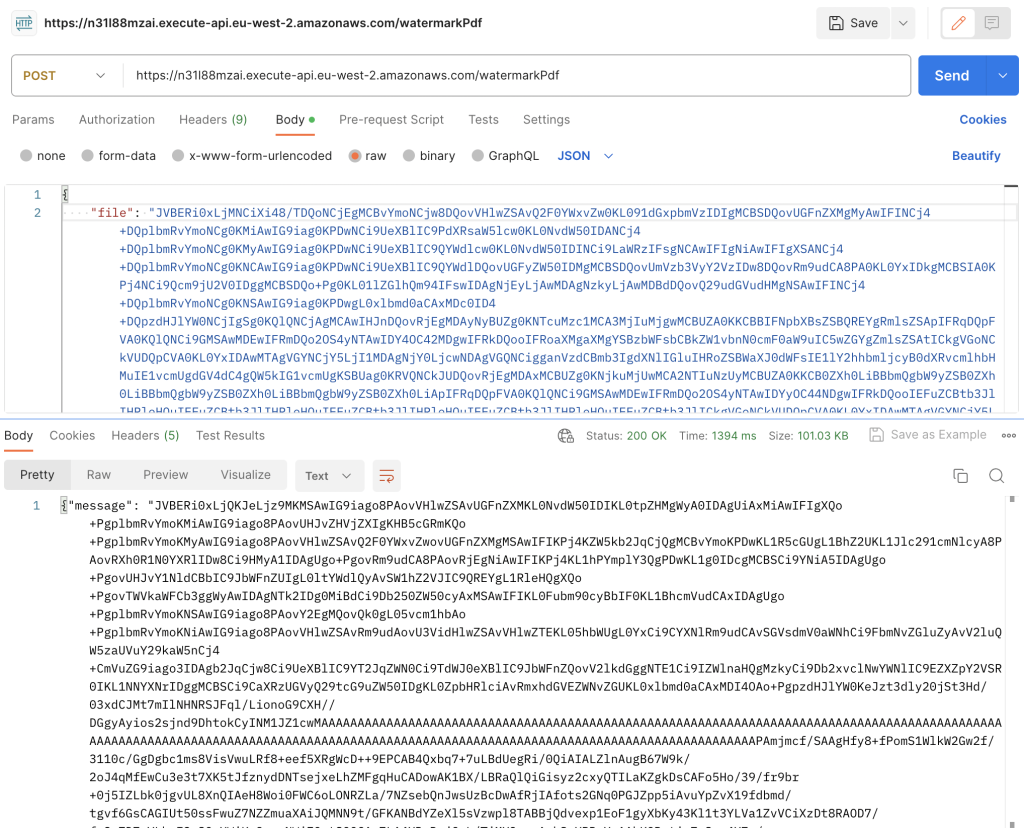
After you’ve entered correct JSON and selected correct settings on Postman hit Send!
The response returned should also be Base64 encoded PDF. You can copy it and convert it back to PDF to see how it looks.
Response looks something like this:
{
    "message": "JVBERi0xLjQKJ very long string... ...abc .... "
}
We’ve now confirmed that our Lambda function is working on our local machine. Now lets package our code and upload it to AWS Lambda.
Important note!!
When data is sent to AWS CLI server running on http://127.0.0.1:3000/hello for example, it will automatically add the data within “body”, this means the code must look for “file” and “watermark” within the “body”. Python code above already does that.
See how JSON looks below. Even though we send it without “body” AWS CLI server automatically adds it.
{
    "body": {
        "file": "AwMDAwMjg3ODMgMDAwMDAgbiAKMDAwMDAzNjQ4MSAwMCg==",
        "watermark": "xyz watermark image"
    }
}
But if you’re NOT using AWS CLI and you send data directly to a typical Python server, the data won’t automatically be inside “body”! And so if you write code that doesn’t look for data within “body” and upload it to AWS, it will throw KeyError. Again, when the code it on AWS, AWS will automatically add “body”!
The code I’ve posted above expects the data to be within “body” (AWS CLI server is already adding body in my case).
Uploading Code to Lambda
We’re now at a point where we can confidently take code from local machine, zip it and upload to AWS Lambda. Yup, it’s as simple as it sounds.
There’s 2 important things to note here however:
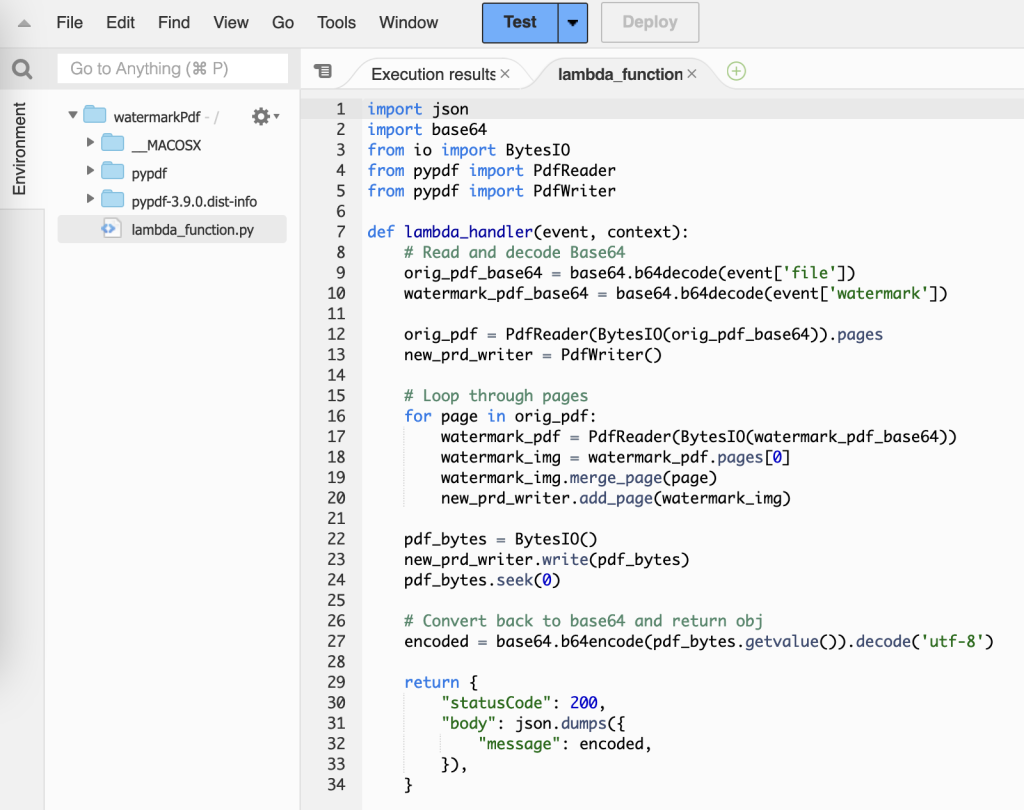
- Main file containing Python function code should be called lambda_function.py and the function name lambda_handler.
- The dependencies should also be in the directory.
I’ve created a completely new directory called deploy where I’ll place the code and dependencies.
To install dependencies you can use pip3 install -t . pypdf this will install pypdf package in current directory. Obviously you must have pip installed locally. (this is different from the previous step where we added dependencies in requirements.txt and ran sam build. That was sam cli way of doing things now we’re doing it in Python.
Once you’ve installed dependencies and placed the code in the directory the file structure will look like below:
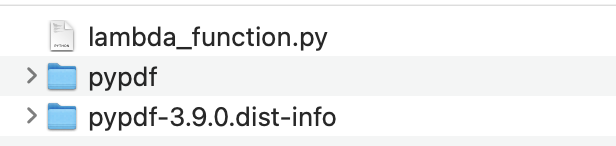
With main function and the dependency in place, zip them into a new folder so we can upload it to AWS.
Creating a Lambda environment & function on AWS
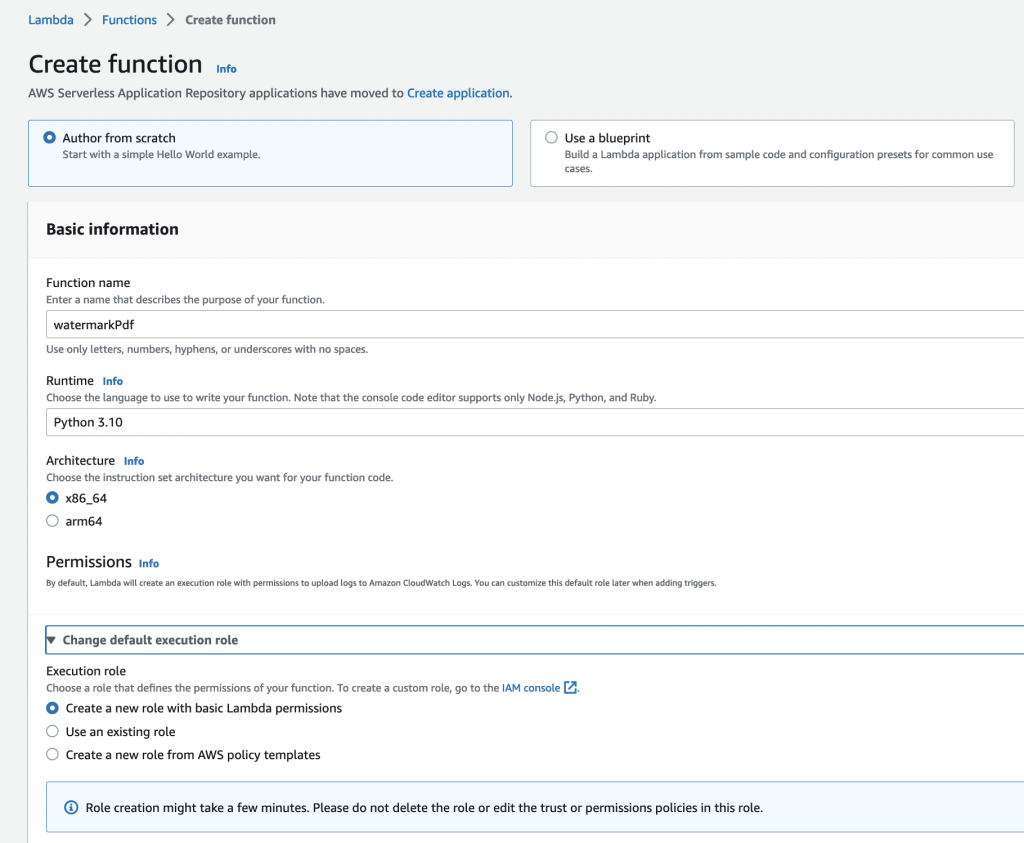
Log into AWS account, search for Lambda service and lets create a new lambda function.
Our code now needs environment to run on. Lets create a new function (and environment), name it watermarkPdf. Runtime/environment is Python 3.10 to match local version.
Lambda will automatically create the environment for us each time the function in invoked (magic!)
Next steps: Upload zip file containing the code & dependency.
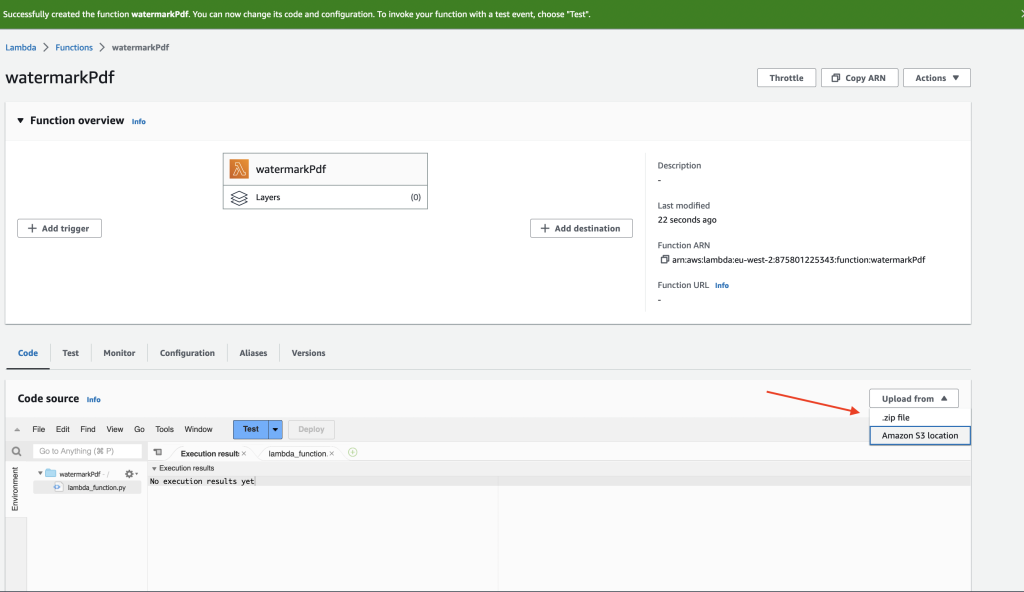
The uploaded code should now be visible (ignore __MACOSX):
What’s next: The code is now on AWS Lambda. One last step is to create an endpoint which can receive POST request (this time on AWS, not locally).
AWS API Gateway – setting the endpoint
So we’ve confirmed that our code is working locally, uploaded it to AWS Lambda, now time to setup the API endpoint which can accept the POST requests.
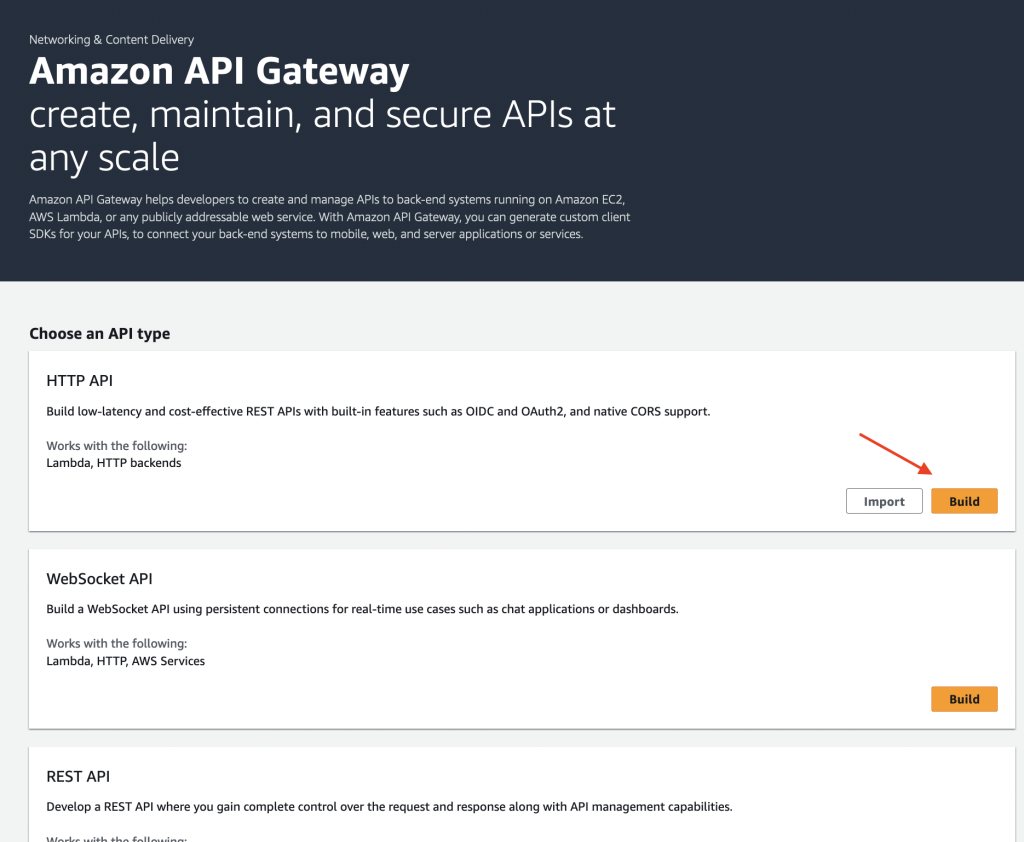
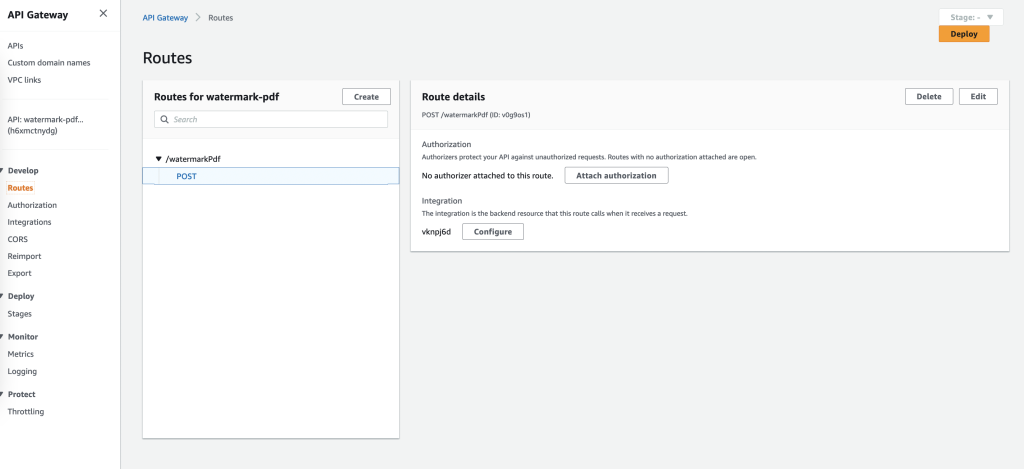
Create an HTTP API endpoint in API Gateway service on AWS that accepts POST request and triggers our Lambda function we setup earlier.
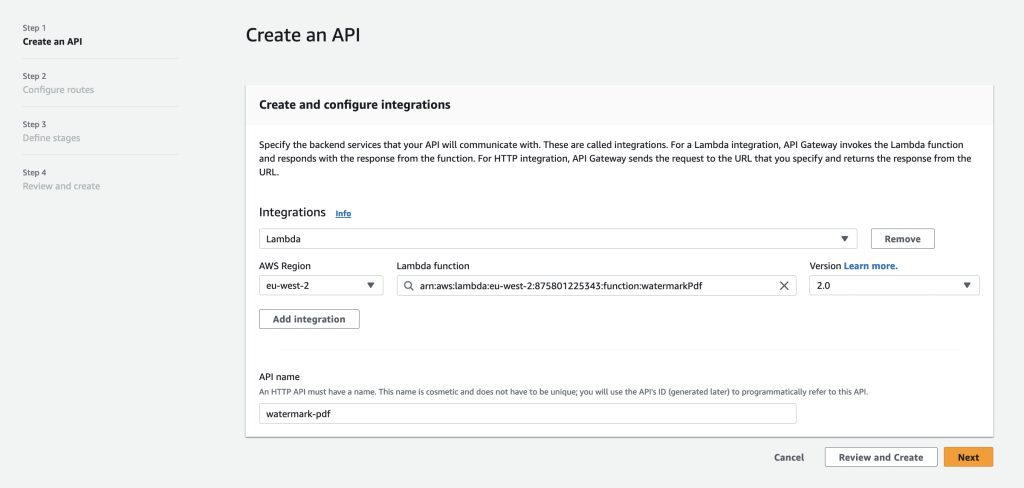
Choose Integrations Lambda and Lambda Function is the function we created in previous step, it should be available in the dropdown.
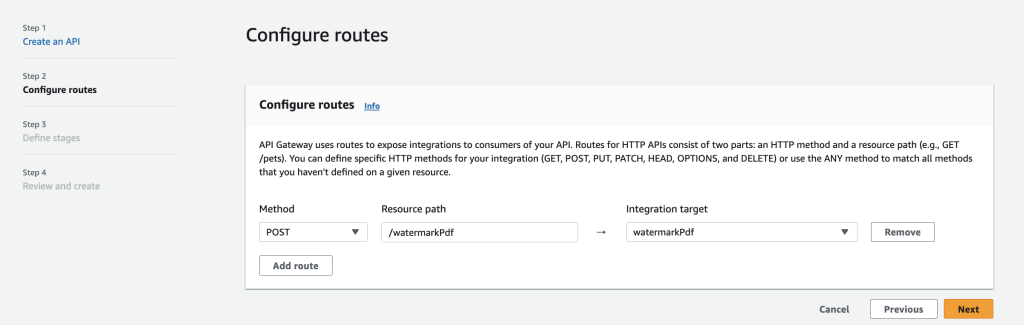
Method should be POST.
Save that, when the API is ready you’ll be given an endpoint.
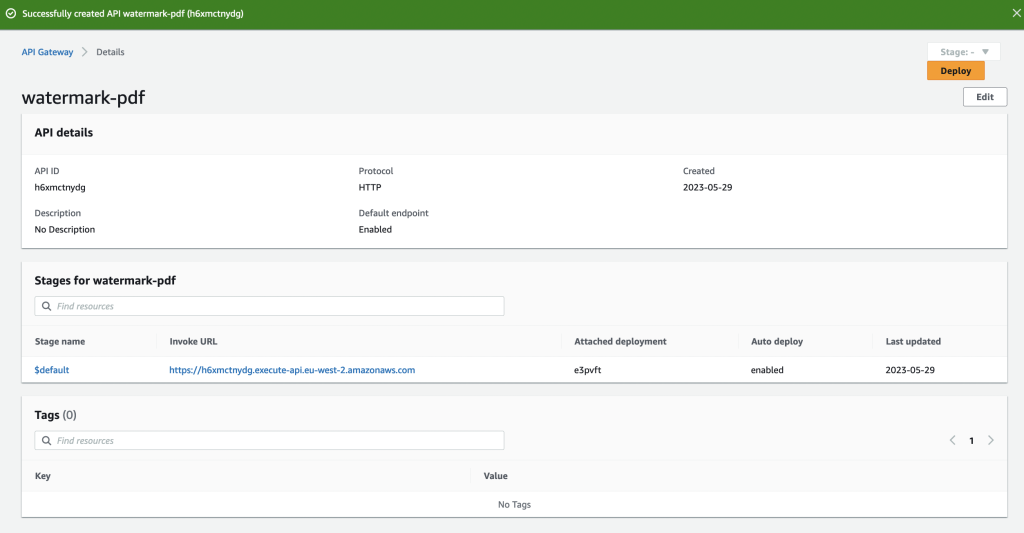
As you can see we’ve been given an Invoke URL, copy it. Lets also find out the path which is shown under Routes in the left.
In my case the complete URL looks something like this: https://h6xmctfjdisofjoisdrandom.execute-api.eu-west-2.amazonaws.com/watermarkPdf (url.com/route)
Finally with access to complete URL and code uploaded to Lambda you’re free to send a POST request with JSON and receive encoded PDF back. Don’t forget to convert base64 back to PDF.
Final results!